How to Check for Aged Inventory Surcharge Fees on Amazon
For Amazon sellers, staying profitable is increasingly difficult as Amazon works to increase their own profit margins. This means not only keeping on top of optimizing your product listings and managing customer reviews but also keeping a close watch on new fees that affect profitability.
One fee that was launched early 2023, and increased in 2024 is the Amazon Surcharge Fee. Understanding these surcharges and where to find them is vital for managing costs and maintaining profitability.
What exactly are Amazon Inventory Surcharge Fees?
Amazon Inventory Surcharge Fees, also known as aged inventory surcharges, are additional fees applied to inventory stored in Amazon’s fulfillment centers for extended periods. Previously called the long-term storage fee, this surcharge kicks in for items stored for 181 days and above. Amazon assesses these fees based on an inventory snapshot taken on the 15th of each month, and they are in addition to the regular monthly storage fees.
How are Aged Inventory Fees Calculated?
Calculating aged inventory fees is done using a first-in, first-out (FIFO) method across the entire fulfillment network. This means that items sold or removed are deducted from the oldest inventory in stock, regardless of which specific unit was actually shipped or removed. For instance, if a recently arrived unit is picked and shipped, it will still be deducted from the oldest inventory available.
These fees are charged on a cubic foot basis and increase as the aged inventory days increases. So the longer your inventory is in FBA, the more you will get charged.
Fee details below (with 2024 changes):

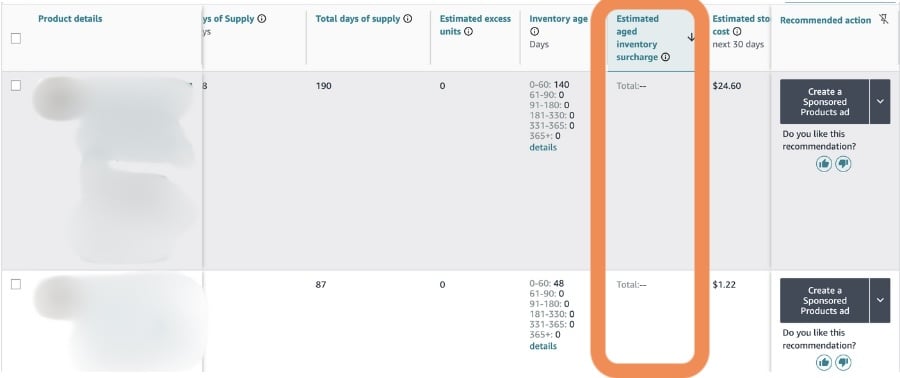
How to Check Your Inventory Surcharge Fees with the FBA Inventory Dashboard
Steps:
- In your Seller Central, click the hamburger menu, then find and select the Inventory tab.
- From the Inventory tab, click the ‘Dashboard’ option from the dropdown menu on the left side.
- Direct link: https://sellercentral.amazon.com/fba/dashboard

- On the Dashboard page, scroll down until you see the section labeled Estimated Aged Inventory Surcharge. From here, you can view the aged units and see how many days they have been in the FBA centers.

Clicking ‘Reduce estimated aged inventory surcharge’ will take you to the FBA inventory page, where you can view all product inventory information, including fees. Here, you will find the estimated aged inventory fees breakdown per product.
Review this information to understand its impact on your account.
Link: https://sellercentral.amazon.com/inventoryplanning/manageinventoryhealth
How to check for Aged Inventory Surcharge with the report
Steps:
- In your Amazon Seller Central account, click the hamburger menu, then find and select the Reports tab.
- In the Reports dropdown menu on the left side, click on Fulfillment.
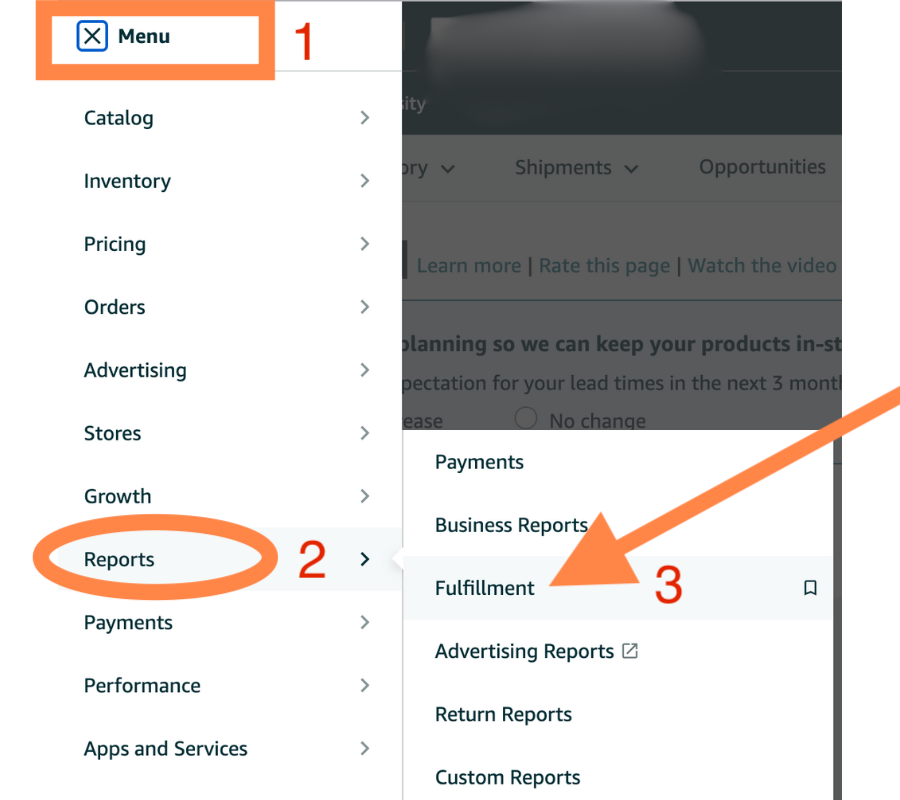
- Go to the Payment Section:
- In the Fulfillment reports page, locate the “Payment” section on the left hand side
- Click on “Show more” to see additional options.
- Link: https://sellercentral.amazon.com/reportcentral/WelcomePage

- From the expanded list of options, select “Aged Inventory Surcharge Report.”

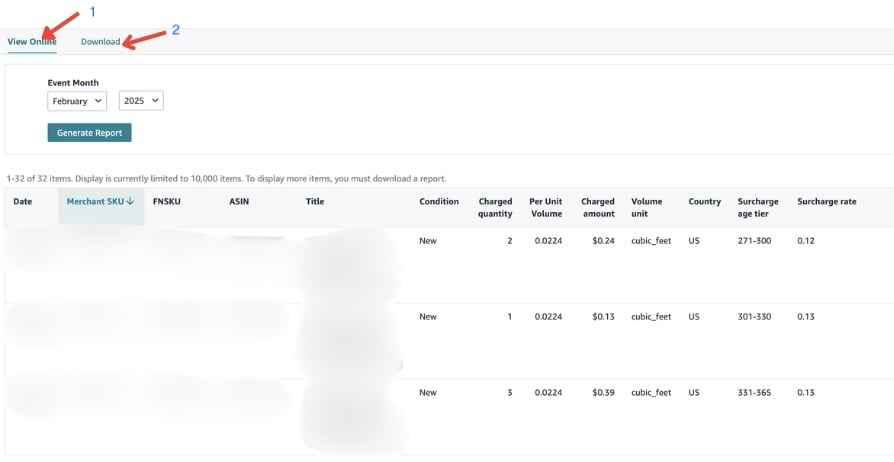
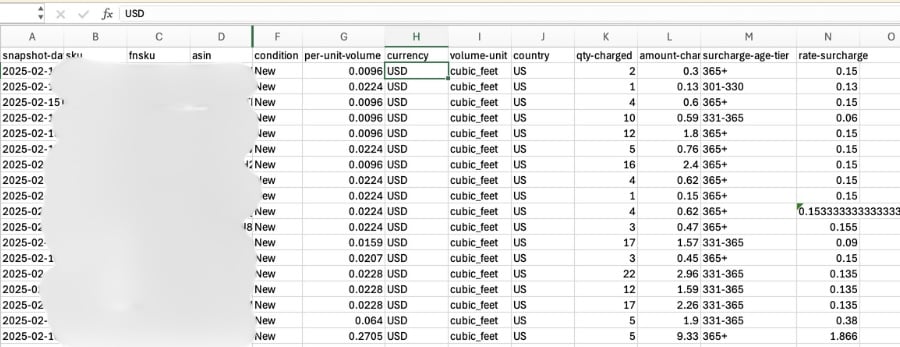
- In the Aged Inventory Report, you have two options to view the report.
- First Option: View Online, by clicking ‘View Online,’ the report will display in the lower part of the screen, as shown in the first screenshot.
- Second Option: To download the report, click ‘Download,’ then select the desired month and year. Finally, click ‘Generate Report. See the sample report on the second screenshot.
- Both the online and downloaded reports show the same data.
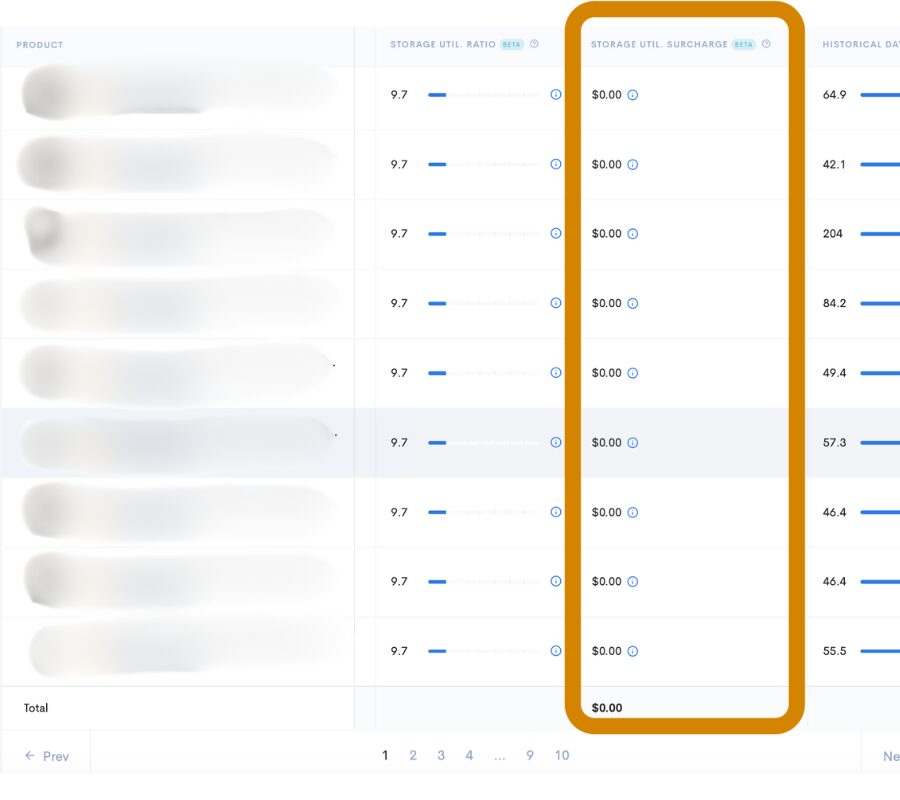
How to check for Aged Inventory Surcharge in Sellerise
Steps:
- In your Sellerise Account Navigate to the Brand:
- Locate the brand you are checking.
- Click on the brand name to access its details

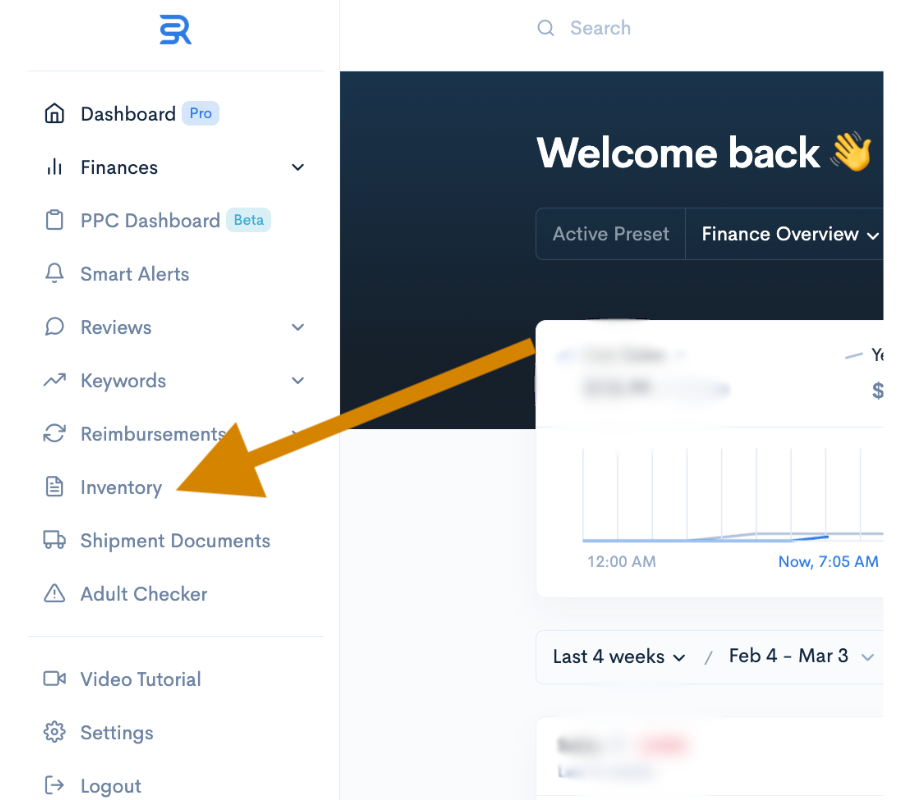
- On the Sellerise Dashboard, hover over the left-hand side to display the menu. Then, navigate to and select the Inventory tab.
- Once you are in the Inventory page, scroll horizontally to the righthand side to see the “Storage Util. Surcharge”
- Review the fees to understand the impact they have on the account