How to Check for Low Inventory Surcharge Fees on Amazon
Amazon sellers are finding it even harder to stay profitable these days because of increasing fees. In 2024, Amazon added Low Stock Inventory Fees along with Aged Inventory Surcharge Fees on top of the regular fees, making it even more challenging to maintain profitability.
What are Low Inventory Surcharge Fees?
Amazon’s Low Inventory Surcharge Fees are extra charges applied when your inventory levels fall below a set threshold. Amazon sets a recommended inventory level for each product, and if you fall short, you’ll incur these extra charges. The idea is to encourage sellers to keep enough stock on hand for smooth operations and fast delivery to customers.
How are Low Inventory Level Fees Calculated?
Low Inventory Surcharge Fees are calculated based on the product’s historical days of supply. The historical days of supply is calculated at the parent-product level. If a product’s historical days of supply falls below 28 days in both the short-term and long-term periods, the low-inventory-level fee is added to the FBA fulfillment fees.
Fee Details Below:

How to Check Low Inventory Level Fees on the FBA Inventory Page
Steps:
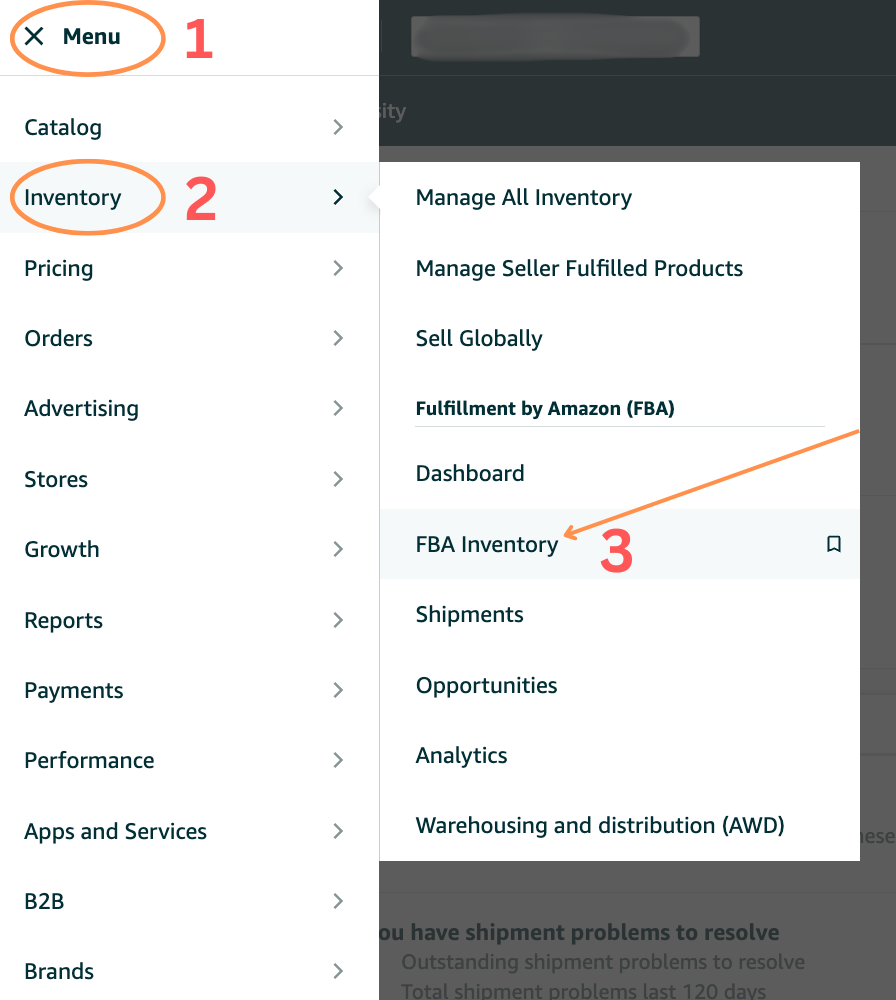
- In your Seller Central, click the hamburger menu, then find and select the Inventory tab.
- From the Inventory tab, click the ‘FBA Inventory’ option from the dropdown menu on the left side.
- Direct link: https://sellercentral.amazon.com/inventoryplanning/manageinventoryhealth
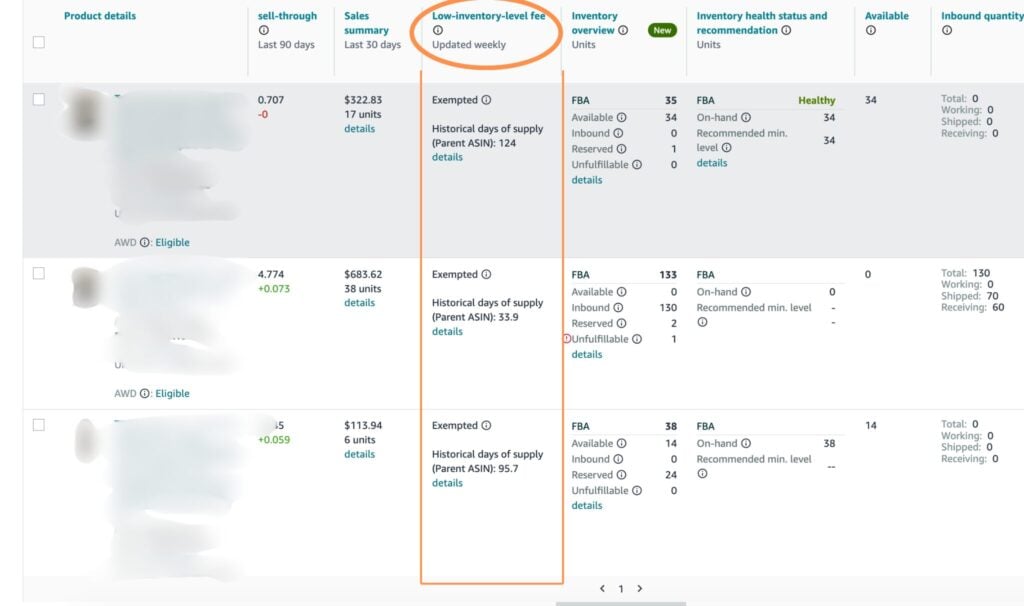
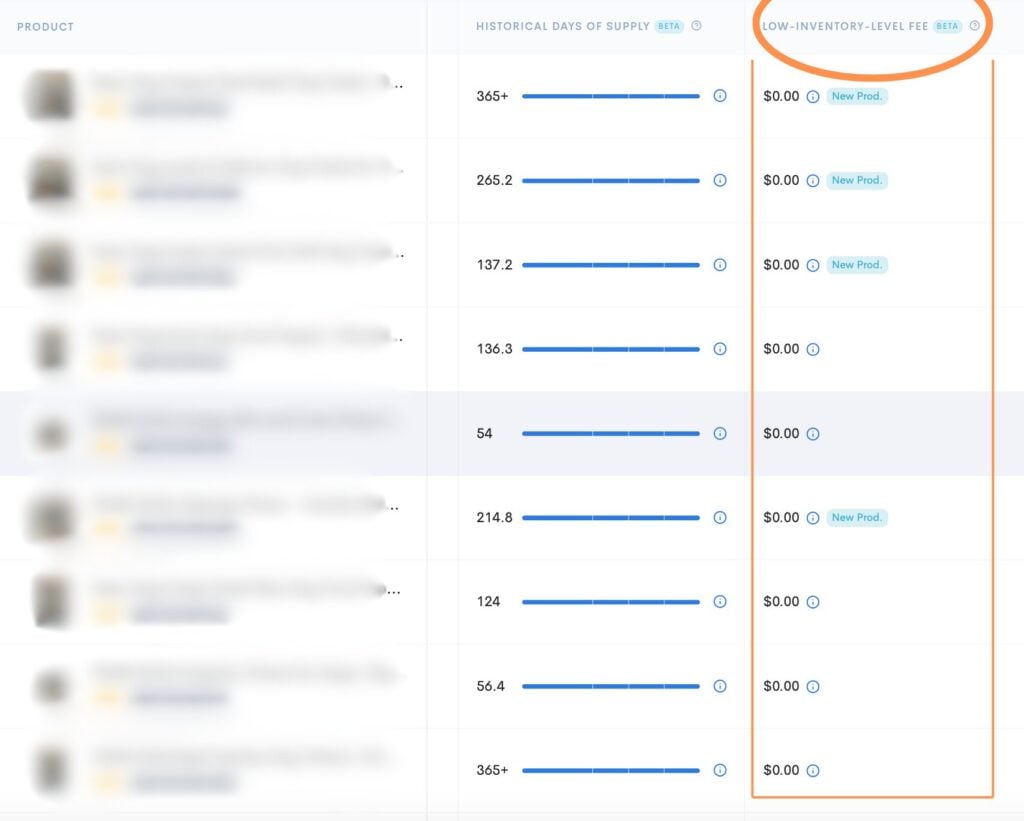
2. On the FBA Inventory page, you’ll immediately see the Low-inventory-level fee in the fourth column.
- Review information as needed
How to Check Low Inventory Level Fees in Sellerise?
Steps:
- In your Sellerise Account Navigate to the Brand:
- Locate the brand you are checking.
- Click on the brand name to access its details
2. On the Sellerise Dashboard, hover over the left-hand side to display the menu. Then, navigate to and select the Inventory tab.
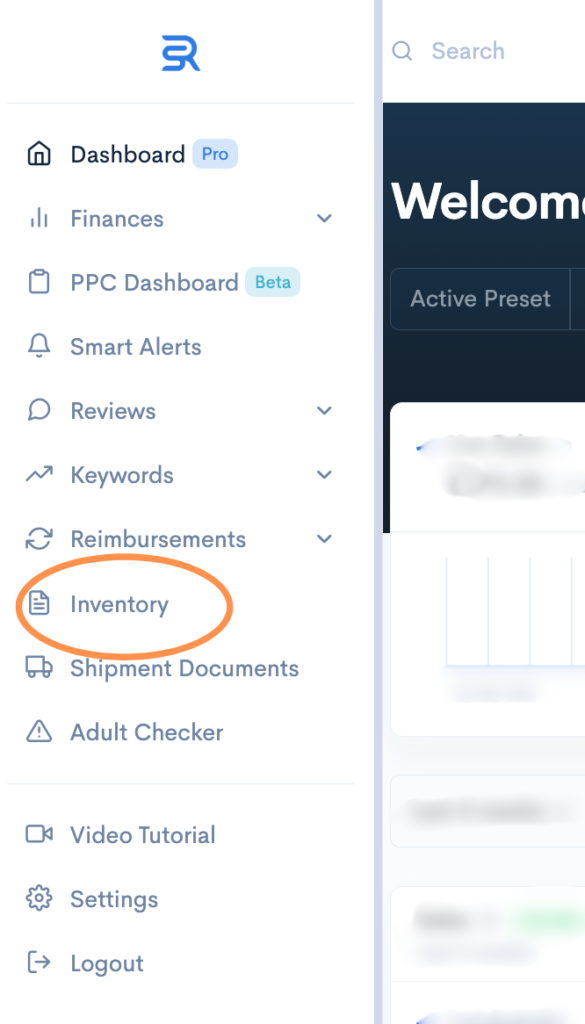
- Once you are on the Inventory page, scroll horizontally to the right-hand side to see the “Low Inventory Level Fee”
- Review the fees to understand the impact they have on the account

Automate Amazon data to outperform your competition with Sellerise
Get 20% off your first 6 months using promo code BETTERWORLD20