How to Send Inventory to Amazon FBA (Send to Amazon Workflow)
You’ve got your product ready, you’ve done the hard work on product research, sourcing, branding, etc. Now, how do you set up a shipment to get your products to the Amazon warehouse? For a new Amazon seller, dealing with Seller Central can be overwhelming at first. If that’s you, you’re in the right place.
We’re going to walk you – step by step – through the “Send to Amazon” workflow so you can ship your inventory to Amazon’s FBA warehouse.
When sending inventory to Amazon, it’s important to find the right balance. Sending too much inventory can result in high storage fees, especially if products remain unsold for extended periods. Sending too little can cause you to run out of stock and miss sales, which may negatively affect your product ranking and may incur low inventory fees.
To avoid these issues, take time to review your sales history, forecast demand, and consider seasonal trends. Aim to send in just enough inventory to meet expected demand while keeping storage costs manageable.
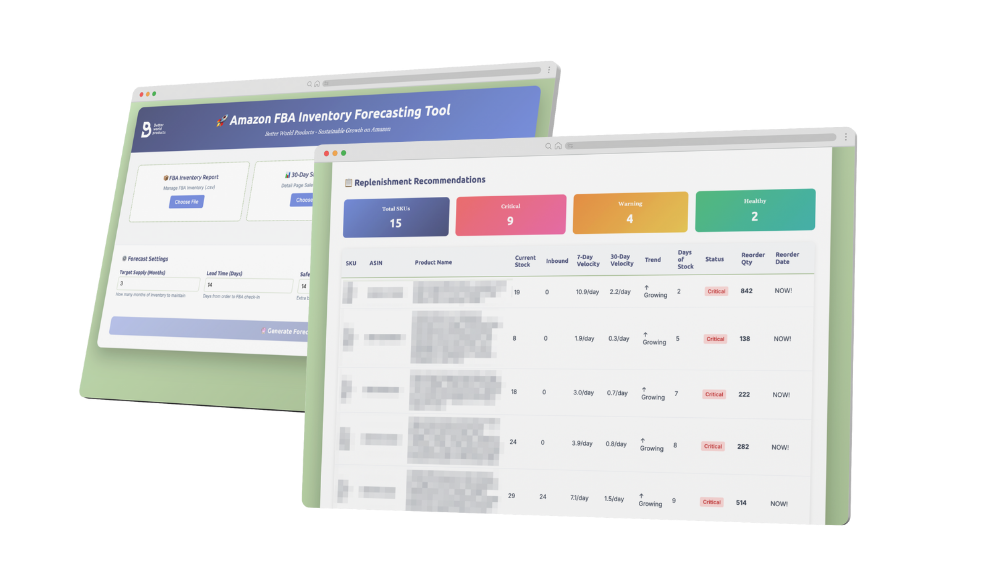
Stop guessing on your FBA shipments
Download our free forecasting tool and start planning with confidence – no spreadsheets required!
Step 1: Start Your Shipment
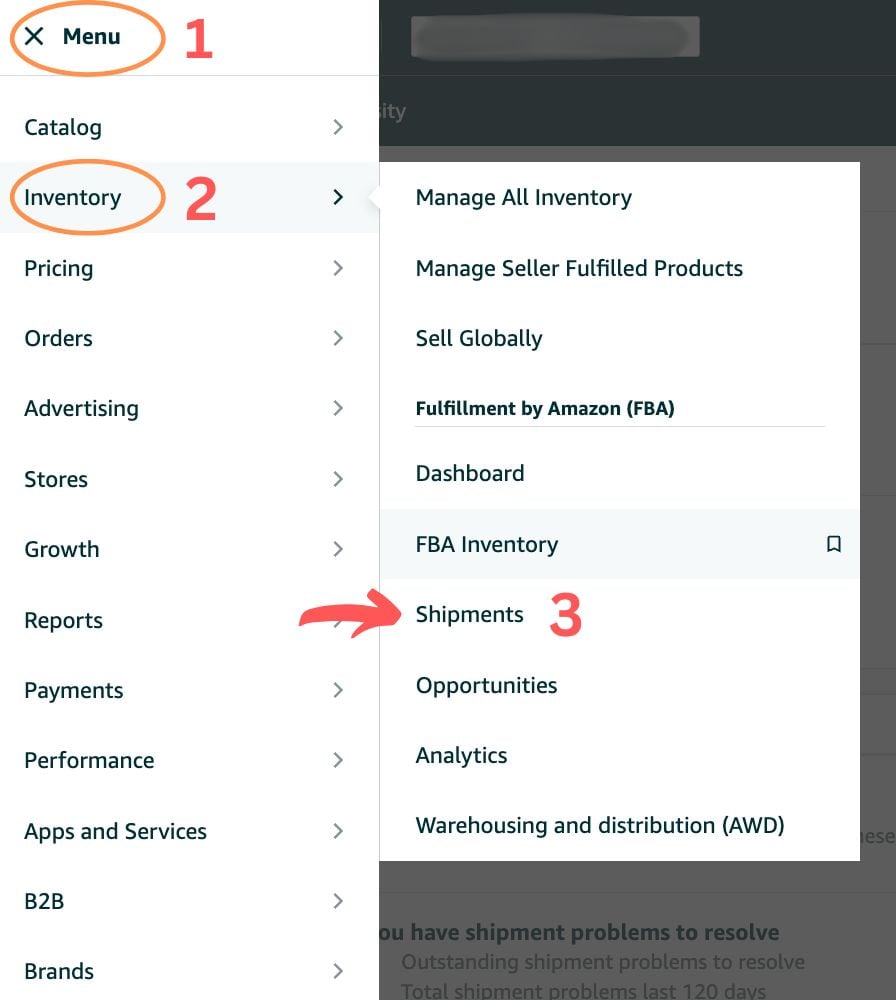
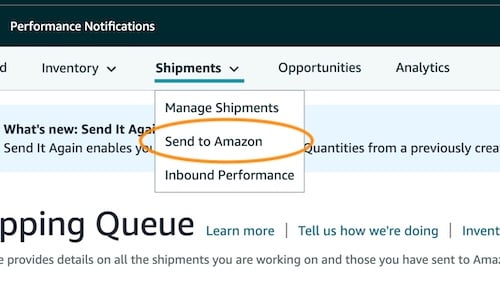
- Navigate to the hamburger menu, select Inventory > Shipments. From there, find the Shipments dropdown and select “Send to Amazon”. This will launch the shipment workflow.
2. Rename your workflow (optional)
Amazon automatically assigns a name to your workflow based on the date and time, with the prefix STA (Send to Amazon). They look something like this: STA (5/25/2025, 3:34 PM)
If you want something more specific, sending multiple shipments or dividing shipments, you may want to assign your own name. Workflow names appear under the Manage Shipments section, so you may have a preference for how you want them to look.

3. Verify Your Ship-From Address
You may have multiple addresses in your account so double-check that your ship-from address is accurate to avoid delays.
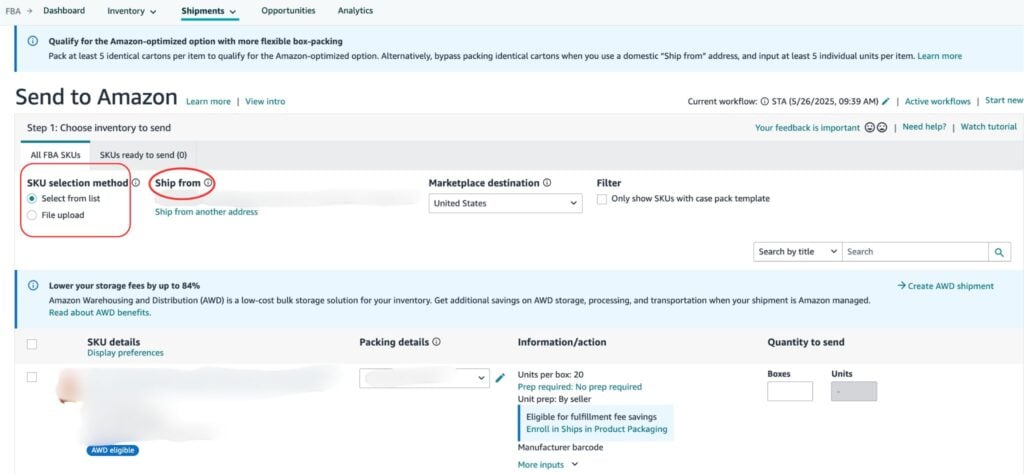
Step 2: Add Products to Your Shipment
You will have a couple of options for how to tell Amazon what you are going to ship. You can do this in 2 ways depending on how much product you’re sending in:
- Option A: manually selecting products (better for fewer products)
- Option B: with a bulk file (Excel sheet) (better for more products)
Option A: Select Products from the List Workflow
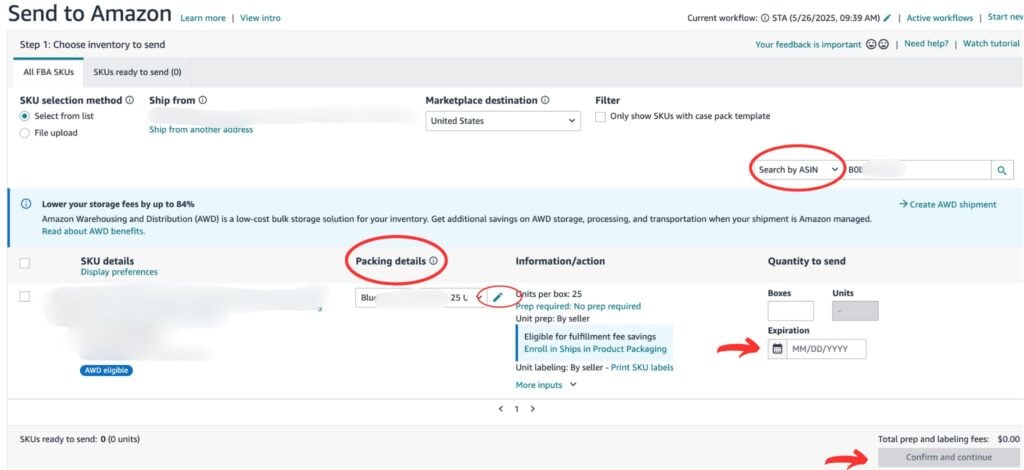
If you have a simple shipment and just prefer to do it manually, then this option is for you. You can search for your products at the top of the workflow. You can search by:
- Title
- ASIN
- SKU
- FNSKU
Just make sure you’ve selected the corresponding one from the dropdown:
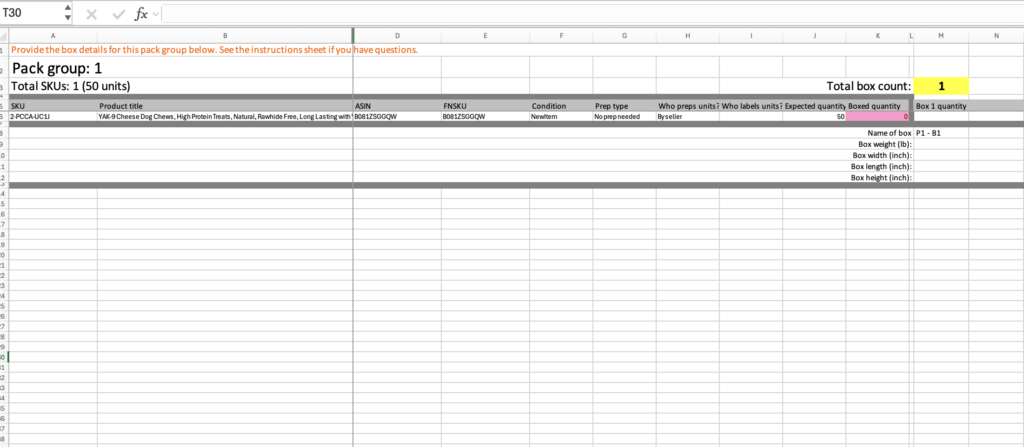
Sending Case Packs
A case pack is a box containing multiple units of a single ASIN.
You can save up to 3 packing templates. To edit a packing template, select it and click the pencil icon.
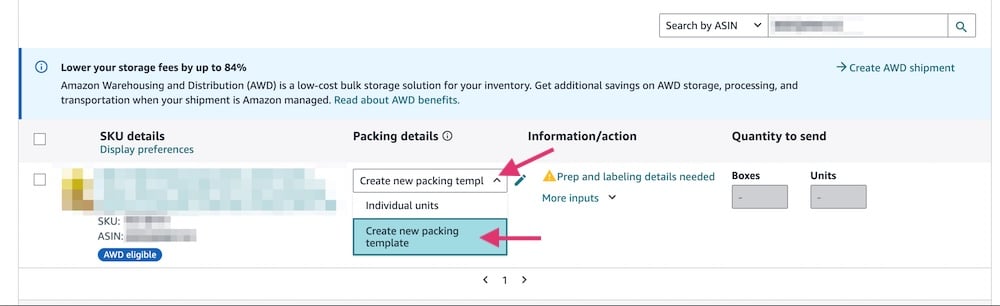
To create a “new packing template”:
- Under the “Packing details” column, click the dropdown and select “Create new packing template”:
- Input the information needed:
- Packing template name {name of the product and number of units}
- Template type {case pack}
- Units per box
- Box dimensions and weight (in lbs)
Tip: Make sure to give each packing template a short, descriptive name for what’s inside. This name appears on the labels, which helps warehouse employees quickly and easily identify what to pack.
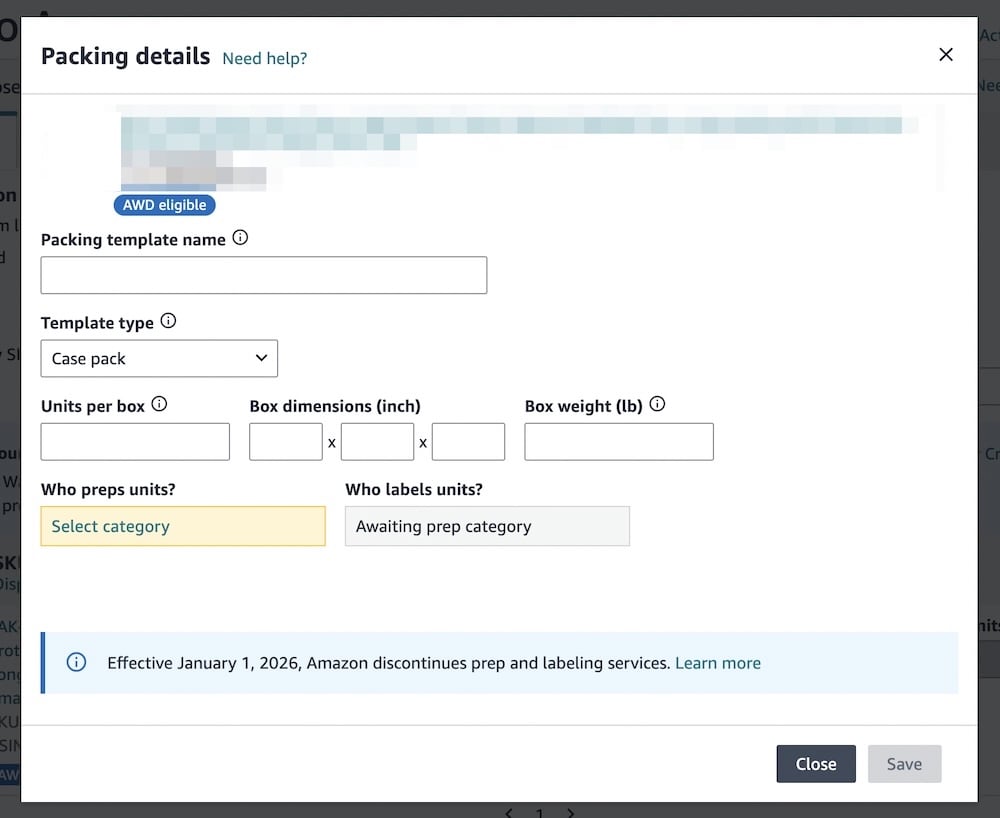
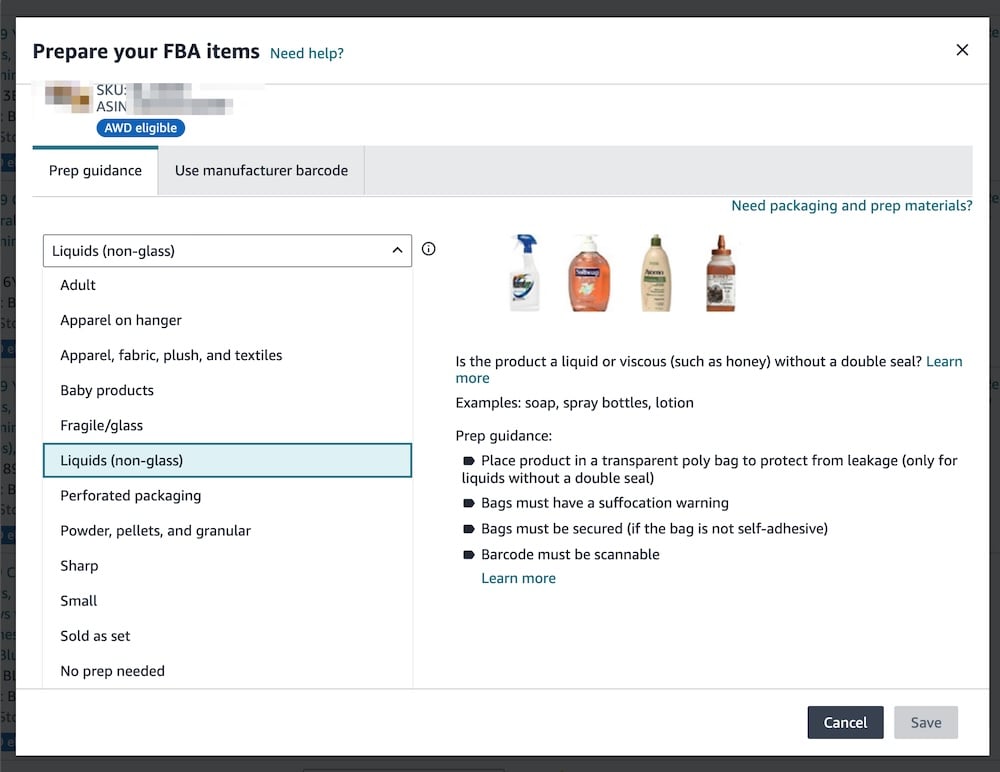
- Enter “Prep category” information where it says “Who preps units?”
- You’ll see a dropdown menu for different categories. If none of these apply to you, select “No prep needed”:
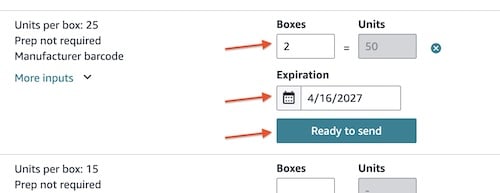
- Once you have created the packing template, enter the number of boxes.
- Input the expiry date if needed, then select “Ready to send”.
TIP: take advantage of Amazon recommendations to use a manufacturer barcode or ‘Ships in product packaging” option to reduce fees and streamline logistics
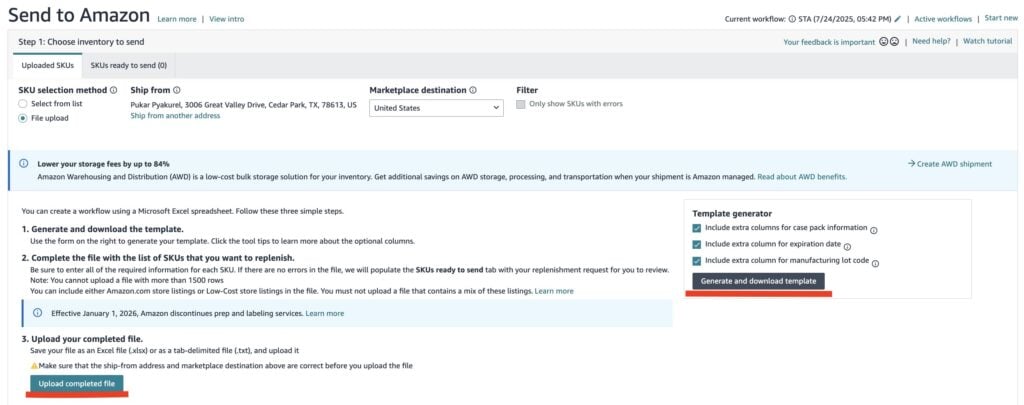
Option B: File Upload
If you are comfortable with using spreadsheets on Amazon, then the bulk file upload is a great option for you.
- Select “File Upload”
- Download the spreadsheet template by clicking “Generate and Download Template“
- Once your spreadsheet is ready, click upload.
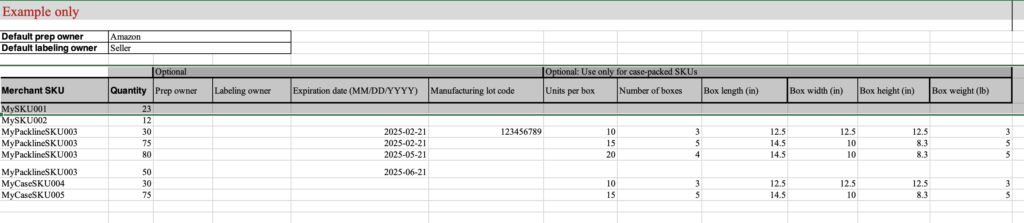
Case packs vs individual units on the file upload; how the 2 bulksheets look.
Step 3. Print SKU Labels (if needed)
For products that require labeling, ensure each item is properly labeled with the correct FNSKU label.
⚠️ Important: Review the Information/Action section to see which items need extra prep:

- Amazon also indicates which SKUs labels need to be printed, where it says: “Print all SKU labels: # (# units) at the bottom of the send to Amazon workflow.

Print those labels and apply them to the units. Labels must fully cover any existing barcodes to prevent scanning errors during Amazon’s receiving process.
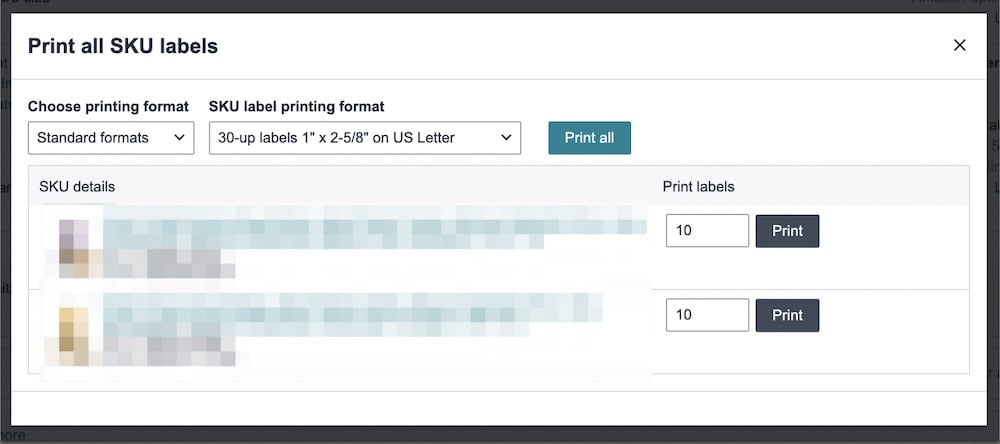
Tip: Print each of the SKU labels separately to make it easier for your warehouse apply them.
Learn more about proper Amazon barcode labeling – this is very important to avoid issues when checking inventory into Amazon:
Related reading:
Amazon FBA Labeling 101
Learn how Amazon FBA barcodes work. Avoid labeling mistakes and ship your products correctly.
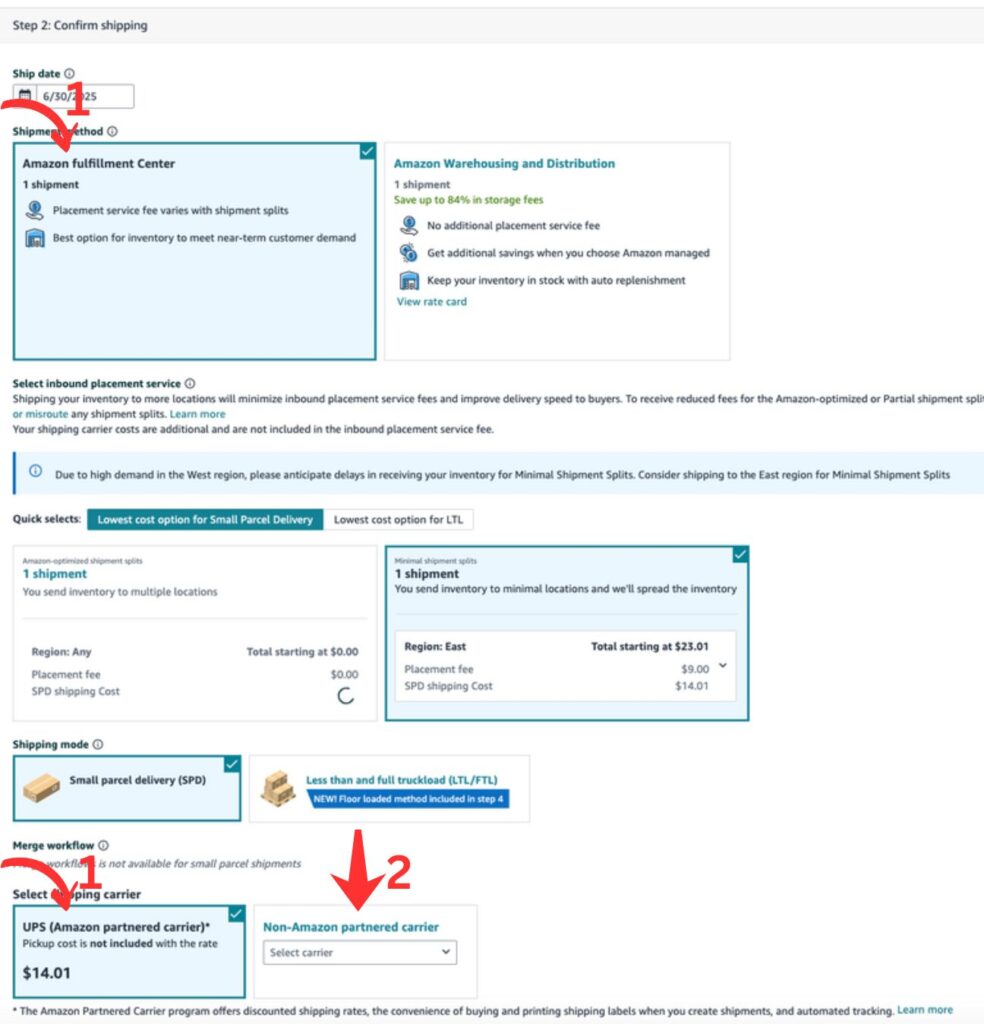
Step 4. Confirm Shipping Details
- Select whether you are shipping with an Amazon-partnered carrier (UPS, which is the most used option)
- Or with your non-Amazon-partnered carrier.
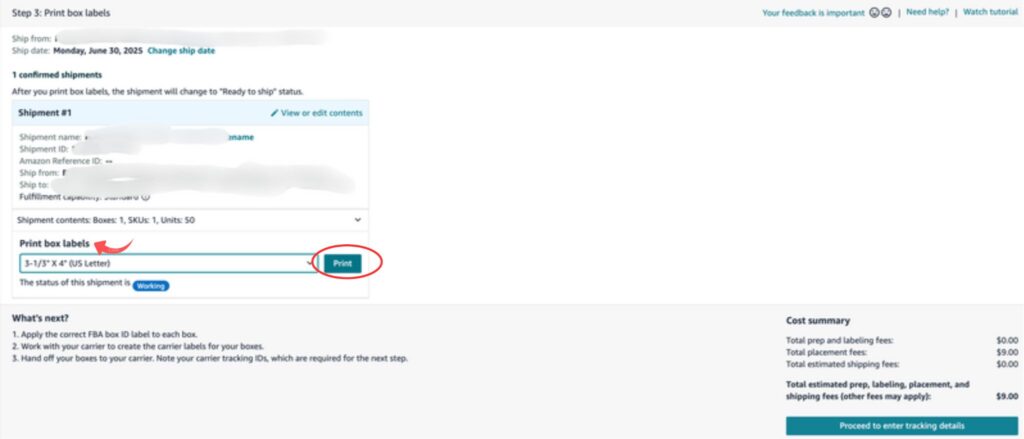
Step 5: Print your box labels
- Apply them to your boxes
- Make sure to cover up any other barcodes on your boxes and put the label on
Step 6: Ship to Amazon FBA
- Double-check your tracking details
- Schedule a pickup or drop off your shipment with the carrier
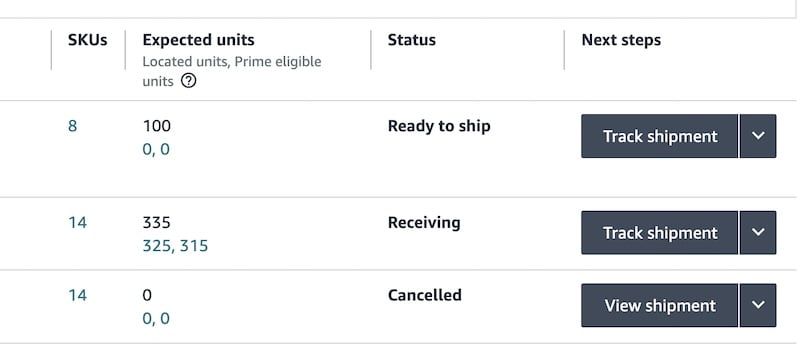
Once you have completed all the process above, you can track your shipments progress (In transit, Receiving or Closed) on the Shipments –> “Manage Shipments”